Overview
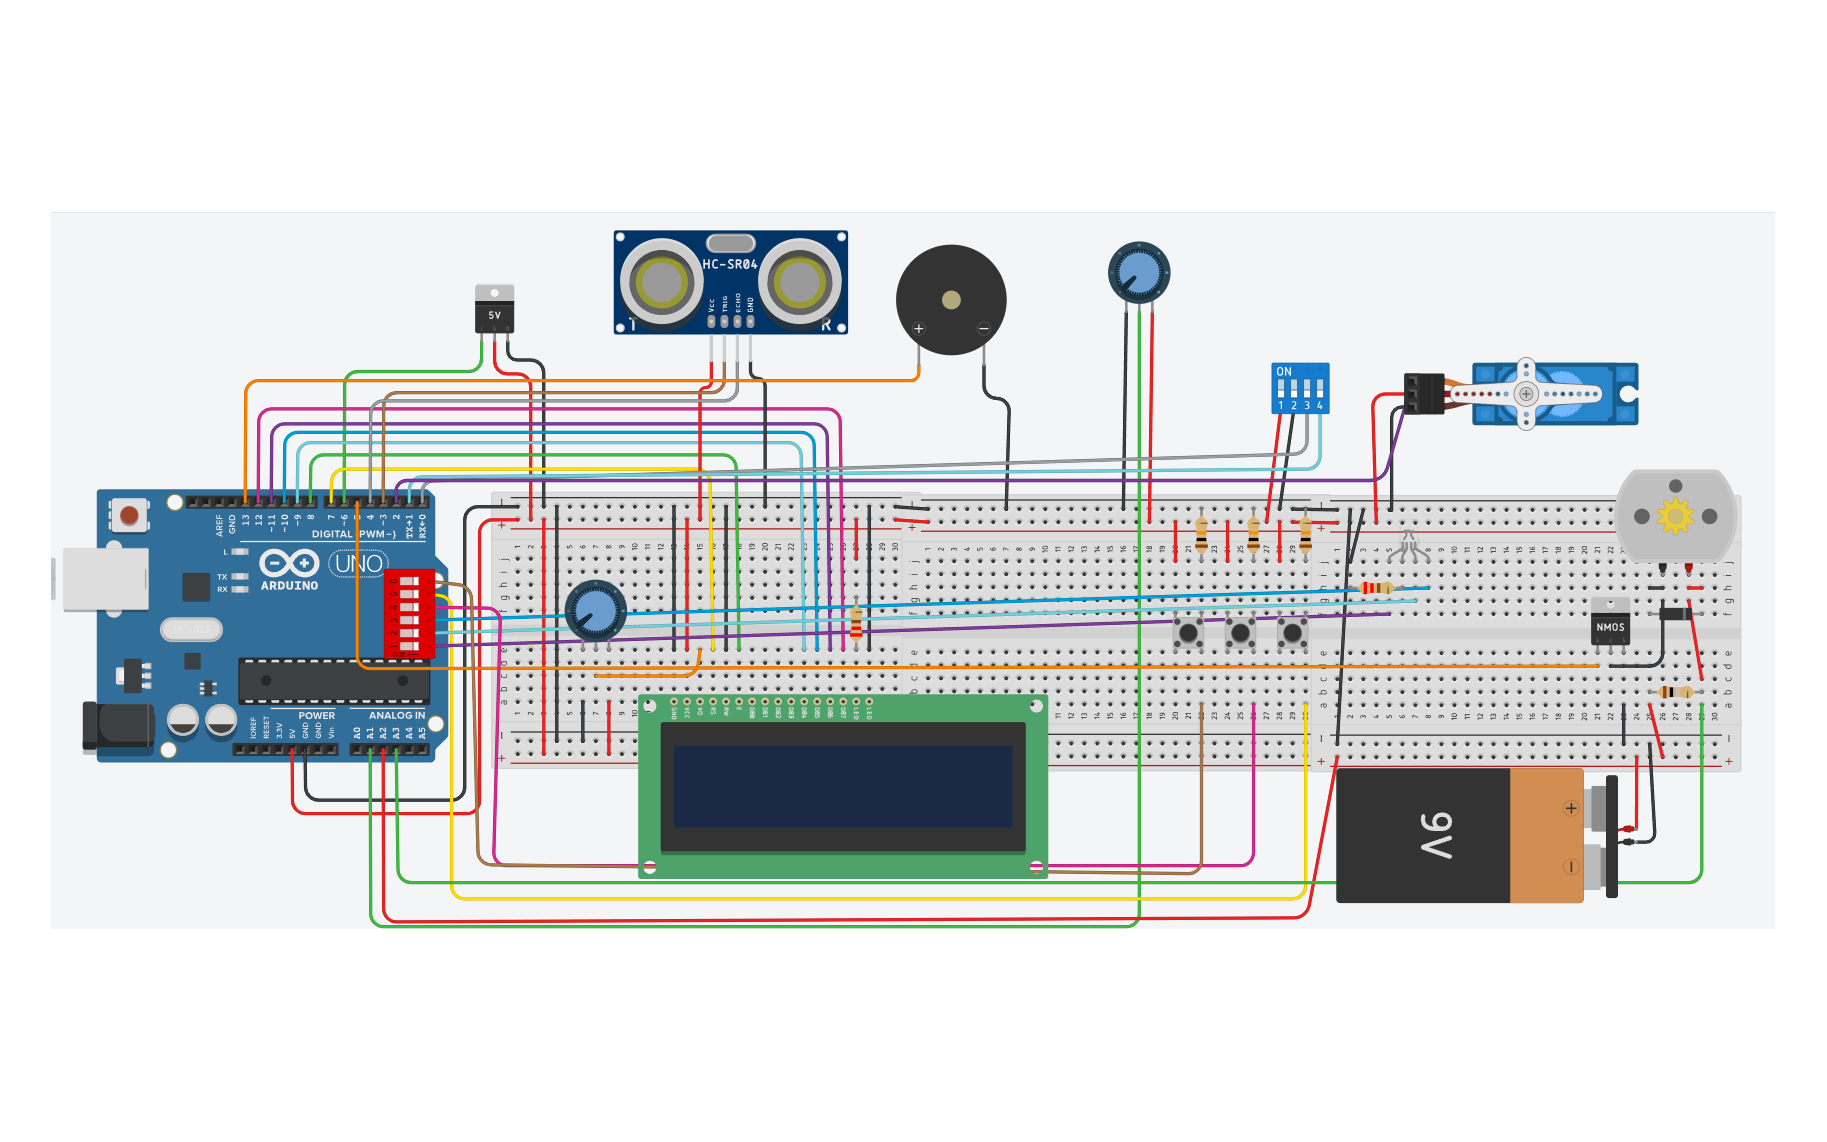
Before a drone flies, its systems can be built and tested on a table. That is what an iron bird is, and in this project our team built one on a single Arduino Mega: sensors, a motor driven from a throttle stick with an emergency stop, power monitoring, a stabilised mode, automatic collision avoidance and a telemetry display, all running together in one program. Each subsystem was first tested on its own and then added to the whole, and every sensor was checked against reality before being trusted.
How it is organised
The bench is split into nine blocks in three groups, all handled by one board: the drone itself, the sensors and actuators of its payload, and a ground station with a throttle stick and a display.
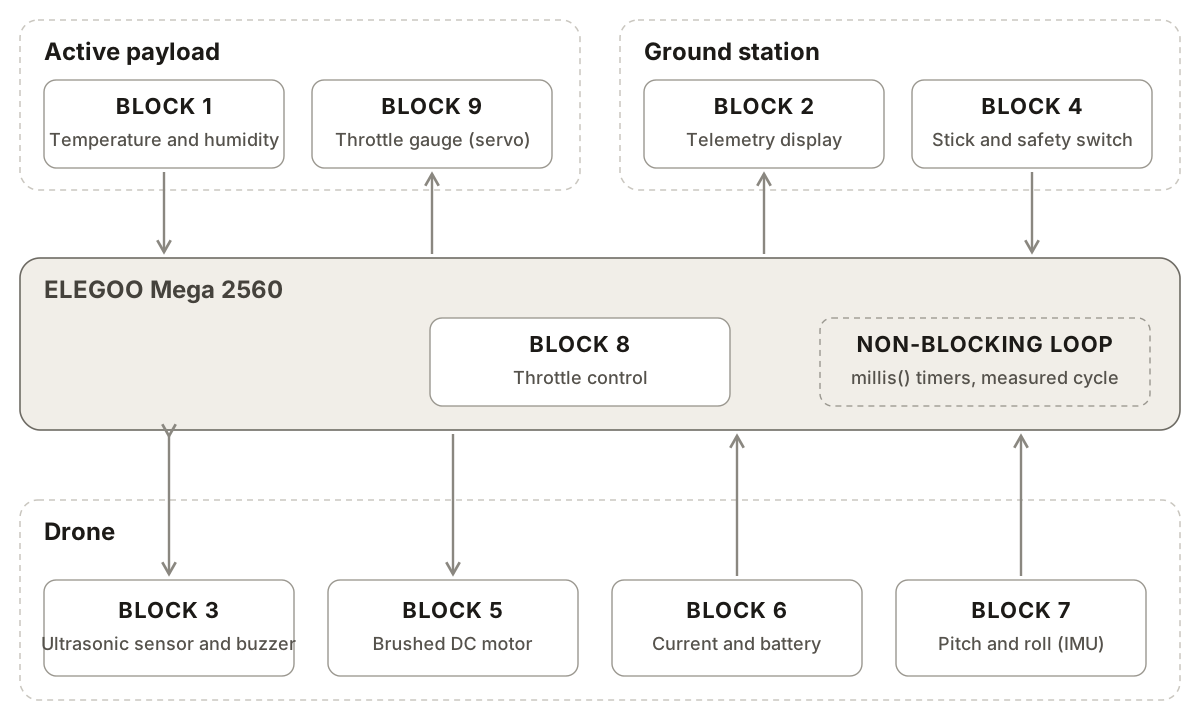
- Drone. An ultrasonic distance sensor with a buzzer that sounds when something comes closer than 20 cm; a brushed DC motor; measurement of the motor current and of the battery’s charge; and pitch and roll from an inertial measurement unit, with a button to calibrate it.
- Payload. Temperature and humidity, and a small servo that works as an analogue throttle gauge, turning like the needle of a speedometer.
- Ground station. A 16 × 2 LCD for the telemetry and a joystick for the throttle, with a button that stops the motor at any moment.
- Throttle control. On the board, the throttle brings these together: a stabilised mode adjusts it from the pitch and roll, and automatic collision avoidance acts on it when the distance sensor detects an obstacle.
Every block runs on its own timer instead of pausing the board, so the motor, the sensors and the display keep responding while a measurement is taken, and the program measures how long each full loop takes.
Checking the sensors
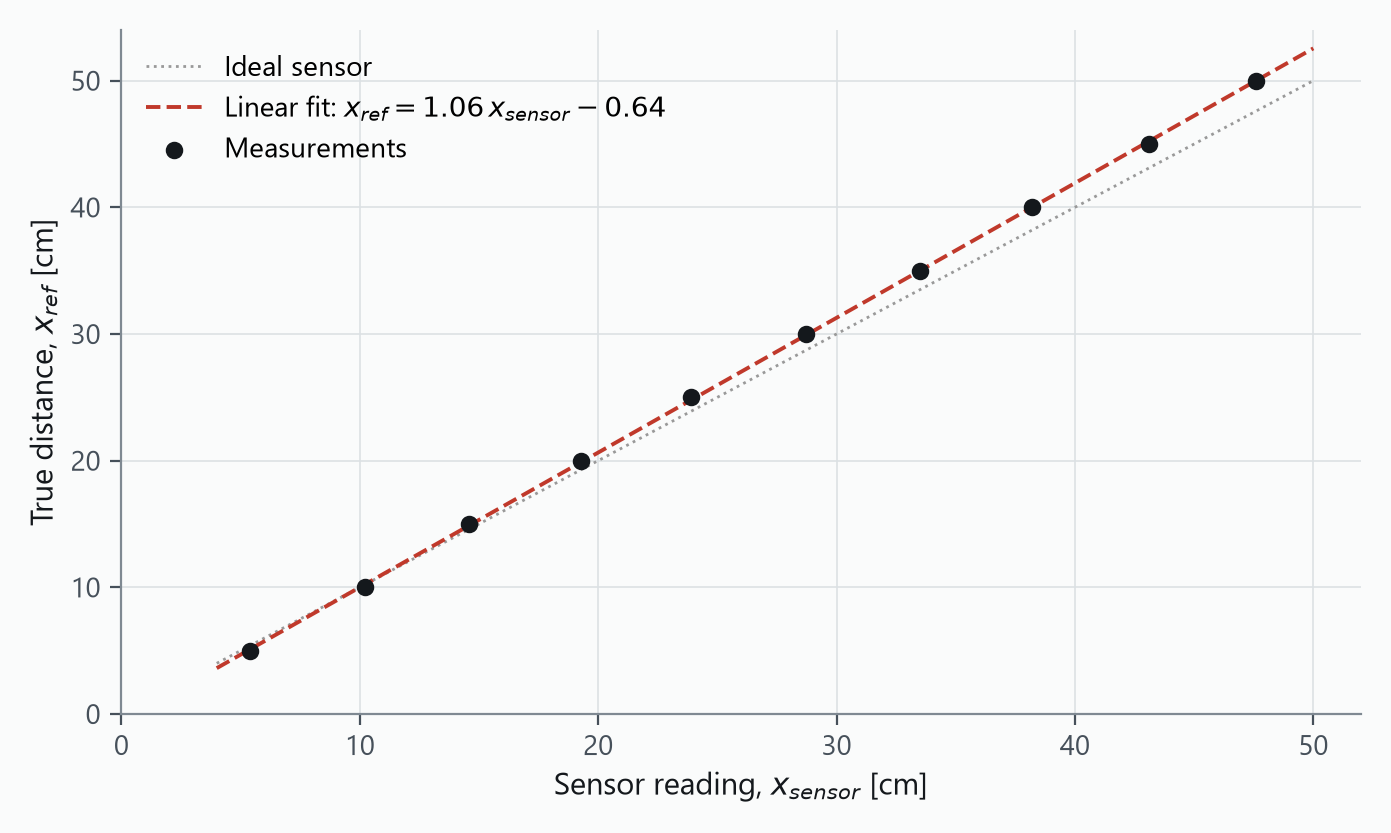
The ultrasonic sensor was calibrated against known distances from 5 to 50 cm. Its error grew with distance, reaching 2.4 cm at 50 cm, so a straight-line fit corrects every reading in the code.
The motor’s current was measured with and without the propeller on a bench power supply. With the propeller it passes 1 A at about 2.5 V, far more than an Arduino pin can give, so the motor is driven through a logic-level MOSFET from a separate one-cell LiPo battery.
Cost
A cost study was made for the hardware and materials used in the bench, giving an approximate total of €93. The board, the display, the battery and the breadboard with its wiring make up most of it.